If you have worked with Jenkins, you are probably aware of the “master/agent” setup of Jenkins. A slave is another node which runs the Jenkins agent and is registered with the master node. The master node may based on server and build configurations configurations choose to offload the build job to the slave nodes.
Slave nodes can such be on premise or on the cloud with AWS. The obvious advantage of using cloud slaves is that you can provision and decommission them in on on demand manner. You can scale the slave nodes based on your build jobs. Further you can also leverage EC2 spot instances to carry out your build jobs.
Here we look at setting up on demand slave nodes for Jenkins
Pre requisites
- You will need a Jenkins master setup either on premise or on AWS EC2(see next).
- If your Jenkins master is deployed be sure to use different AMIs for your master and slaves. You could accidentally end up terminating your master node.
- Install the Jenkins EC2 Plugin.
- The Amazon EC2 Plugin requires root access - either by ssh'ing to to root or requiring the non-root user to have sudo. If you use the Amazon linux AMIs then the EC2 user.
- AWS API credentials and IAM policy to create, start, stop and terminate EC2 instances.
Step 1 - Create you AMI.
You can use any existing linux AMIs you have access to or create a new AMI from of your Jenkins instances or any other linux based instances. Just make sure, in case you are running your master instance on AWS , in the same account, use an AMI that is different from your master instance. Using the same AMIs as your master for the slave instances in the same AWS account, can accidentally delete the master node.
Step 2 - Configure AWS credentials with Jenkins
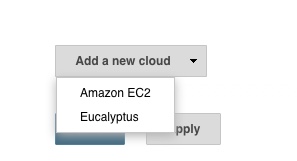
Once the Jenkins EC2 plugin is installed, head over to Manage Jenkins and then to Configure System page. Scroll to the end to the “Add Cloud” section. Choose Amazon EC2.

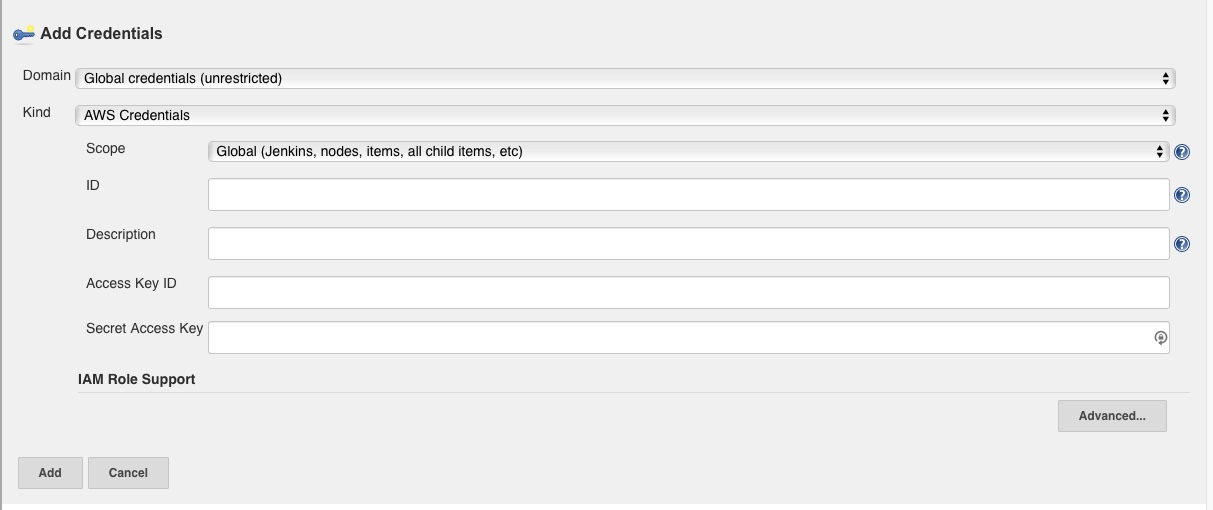
Next, enter the access credentials for AWS, the Access Key ID and the Secret Access Key ID

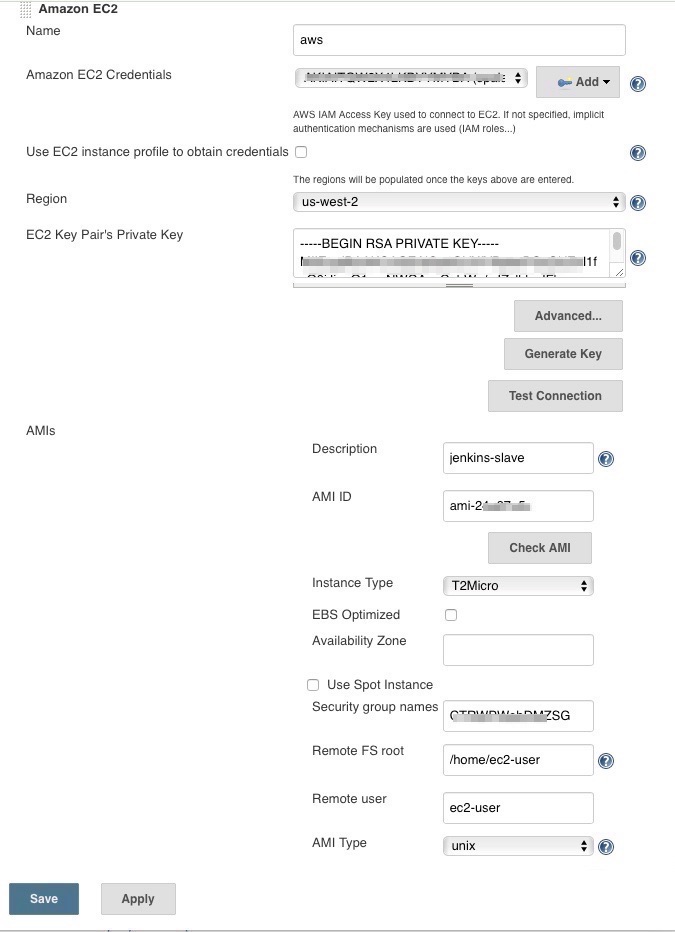
Test connection and ensure it is a success
Step 3 - Configure the Jenkins EC2 Plugin
Next we will provide configuration information specifically for the AWS slave nodes we will launch on demand. This will include the following

- The AWS region (ensure you use the same region as your AMI)
- The AMI ID - The ID of the AMI created in Step 1
- The private key for your ec2 instance (you can also create a new one from jenkins) or any existing key pair.
- A security group.
- The remote FS root - This will depend on AMI, for example if you use the Amazon Linux based AMI, it will probably be
/home/ec2-user
- The remote user - Again will depend on AMI, for example if you use the Amazon Linux based AMI, it will probably be
ec2-user
- Labels - Choose a label, we can use this force specific builds on this slave
- Usage - For testing, we choose “Only build jobs with label expression matching this node”
- Idle termination time - The idle time after which you want the instance to be terminated. If you do not want Jenkins to automatically terminate your instances, you can keep this as 0.
- Subnet ID for VPC - Under the Advance section, choose the subnet ID where you want the slaves to be launched. This is important and your slaves will not launch without this parameter.
Step 4 - Submit a slave build
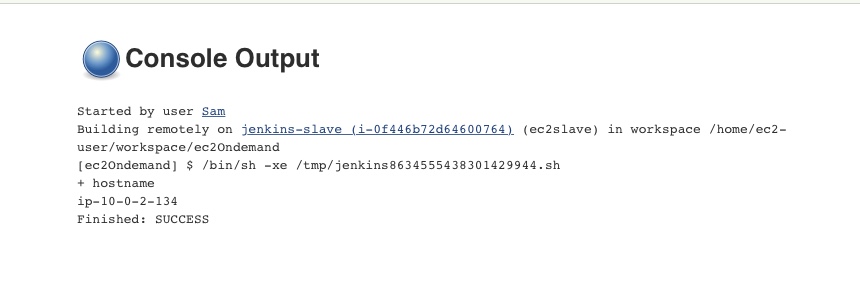
Submit a new slave build restricted to be run on node matching the label we specified while configuring the EC2 plugin

View output of your builds as usual

Step 5 - Clean up
If you were just testing this configuration, be sure to delete any slave nodes that are still running on AWS.

Also if there are any scheduled or pending build queues in Jenkins, be sure to delete them as well. As a best practice if you are not yet deploying this, you can rotate your API credentials and create new credentials specifically for Jenkins when you are ready for production deployment.